|
PIAS Manual
2026
Program for the Integral Approach of Shipdesign
|
|
PIAS Manual
2026
Program for the Integral Approach of Shipdesign
|

You can select tanks in one of the ways below. A selected tank is marked by black on white cross-hatching in the section windows.
The information of this tank is now shown in de Tank information-window 6.
Once a tank has been selected, there are several ways to edit tank data:


With [Window]→[Define window layout] the initial window layout can be defined. The main window contains a number (with a maximum of nine) of subwindows from which the size and position can be set here. In the leftmost four columns the position of the four edges of each window are defined as a percentage of the height and breadth of the main window. In the column ‘window’ the type of window can be given. If the window type is a ‘fixed cross section’, the cross section location can be given in the last column. In the figure below the settings for the layout of the figure above are listed. By the way, [Window]→[Default window layout] brings back the original layout.

With the [Output]→[Totals] option an overview of the weights of the tanks of the selected tank group is presented, as well as the total weight (at the bottom of the popup box that appears). By the way, the total weight of the selected weight group is always printed in the status bar 9 of this module.


With this option tanks can be selected of which the data must be read from the tank measuring system.
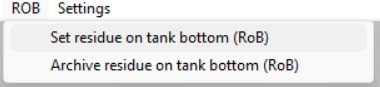
This option allows users to set the residue on bottom (RoB) values for each cargo tank in a single menu. The purpose of this functionality is to assist users to manually adjust the RoB value of each tank, or initialize it by copying the tank volume value in it.
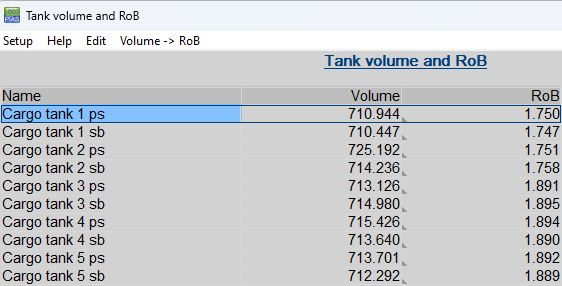
By selecting [RoB]→[Set residue on tank bottom (RoB)] from the toolbar, the user is transferred in a menu where all the tanks are listed, with their volume and RoB values in the corresponding columns. The user is allowed to adjust only the RoB values of the menu. However, giving a new RoB value to a tank, it may affect the tank volume field as well.
The user is able to adjust the RoB values in two ways:
Both ways can be applied on a single tank or on a multiple tank selection. In both cases, the new input value is being checked and if it exceeds the 10% of the total tank volume, a confirmation message pops up in order to inform the user about the current adjustment. By confirming the popup message, the new RoB value is being assigned to the tank. Otherwise, the adjustment is dismissed.
By exiting the menu, all changes are saved and the tanks have now been updated with the new volume and RoB values.
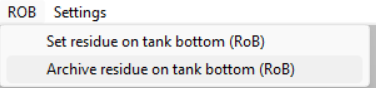
With this option the user is able to see an overview of all RoB archive entries. The purpose of this function is to collect and preview all archive entries in one menu, where each entry contains a set of the main data per tank, for all tanks, which are directly taken for the current loading condition.
By selecting [RoB]→[Archive residue on tank bottom (RoB)] the user is entering into the menu, where he can see all the available archives saved in the system, sorted from the most recent one (on top of the list) to the oldest one (bottom of the list).
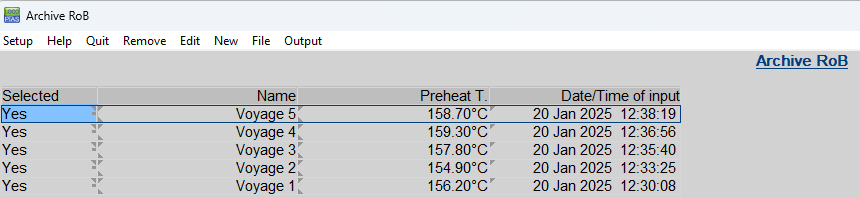
The user is able to create a new archive by selecting the toolbar option [New]. In this way, a new archive entry will be added on top of the list. The name of the entry will initially be filled with the name of the current loading condition. The date and time field is the creation date/time and is filled automatically when the archive entry is being created. For each archive, the user can edit the name and fill the preheating temperature field, as well as select/deselect the archive for output and/or export.
An archive can be deleted by selecting the [Remove] option from the toolbar, after confirming the action through a popup window.
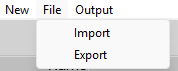
With the [File]→[Export] option, the user can select a file location and a file name, and export the selected entries in a file with (.rob) extension. In the same way, an (.rob) file can be imported through the [File]→[Import] option and all the archive entries in that file will be added to the list. The archives will be still sorted by date and any double entries will be skipped.
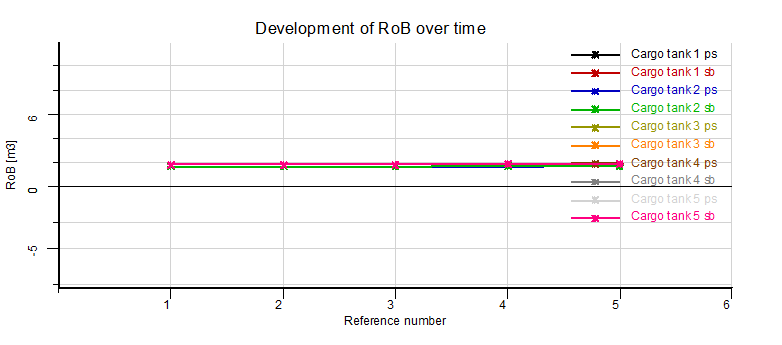
With the [Output] option, a report of the selected entries can be printed. When more than 1 archive is selected for output, 3 graphs are added to the output showing the progression over time.
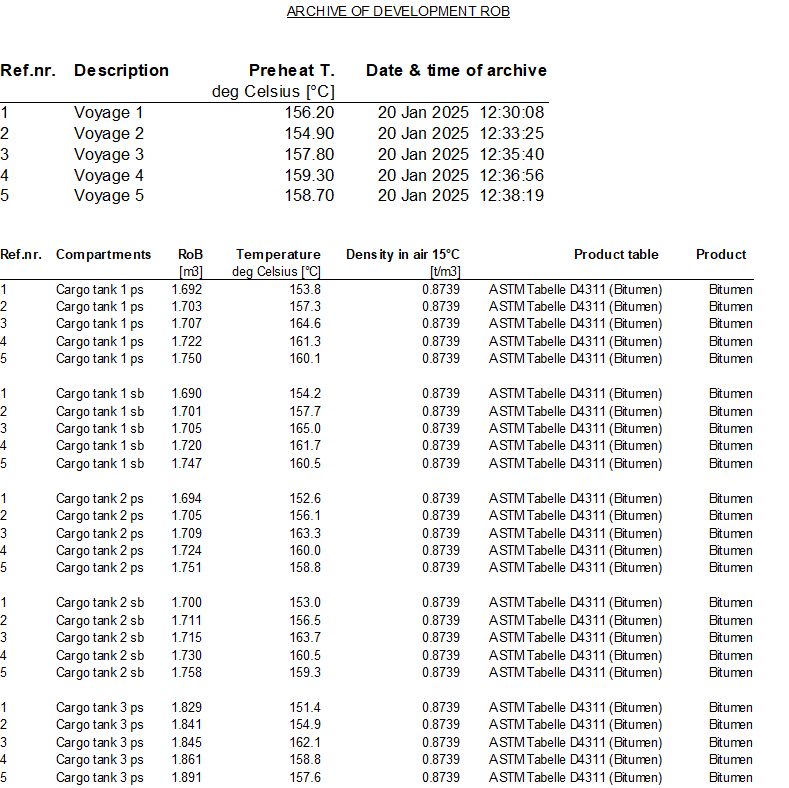
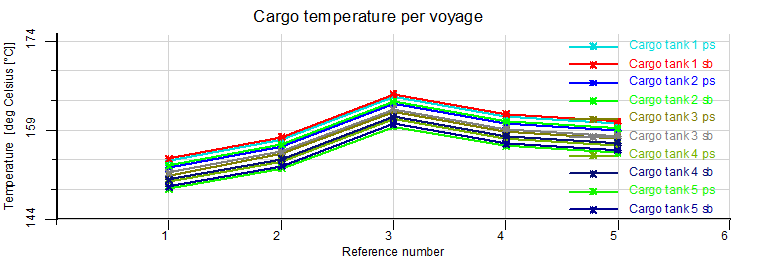
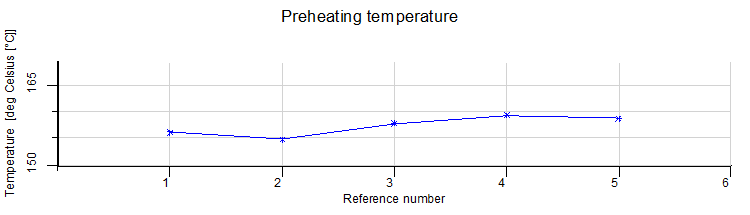
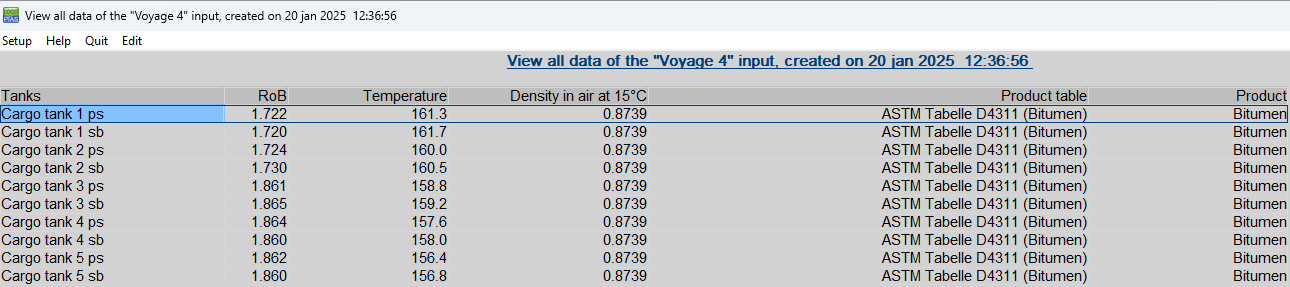
Furthermore, each archive entry can be entered (double-click or [Enter] on the row), and the user is presented the following data for all cargo tanks of that specific entry:
Note that in this overview, the information is just for preview and thus, the user cannot modify any values of the archived entries.
By exiting the menu, all adjustments made on the RoB archive entries are being saved.
In [Settings] you can find the option ‘Filling percentages’, an option for displaying graphical tank information and an option to select the color of the tanks: individually or per tank group. Under [Settings] it is also possible to show all tanks of the same weight group in the color of that tank group by enabling the setting in the menu [Settings]→[Tank colours per weight group setting].

These options are the same as in the list of weight items, see Define/edit weight items, option [Window]→[Result windows].
With this option the tank volumes, and possibly other data, are automatically read from the tank measurement system which is used on board.
With this option the contents of a tank can be pumped from one tank to another of the same tank group. First select two tanks of the same tank group (with a selection-window or with <Ctrl>), then select the option [Pump] from the Function-buttons. Now it is possible to pump the fluid with the trackbar. In the Tank information window the data of one of these tanks will be displayed. During pumping the total volume of the contents will remain the same.